I’m not the greatest oil painter in the world, but I might just be the best Neverhoood oil painter in the world. The Neverhood is a video game we made through Dreamworks Interactive and it’s the closest thing to my style if there is such a thing. The purpose of this post is to give you a string of convenient tutorials on how I generally oil paint. This is just something that works for me and it might just be something that works for you. It’s made to make bad painters look good! One quick note is that you might find it easier to view these if you subscribe to my Facebook page. That page is pure gold where I regularly post live art sessions (and an occasional koi pond update) from my studio in Franklin, Tennessee.
Inspiration
I hadn’t painted in over a year and I decided to paint 100 watercolors for a Kickstarter. What started as a lark had me making over 600 unique works of art in about a month and a half!
https://www.kickstarter.com/projects/tennapel/make-100-doug-tennapel-original-watercolor-inks
But one of the most common requests was to make these little watercolors of the Neverhood. As I painted them in watercolor, I kept thinking This is my style!
https://youtu.be/PMorgO8MDqY
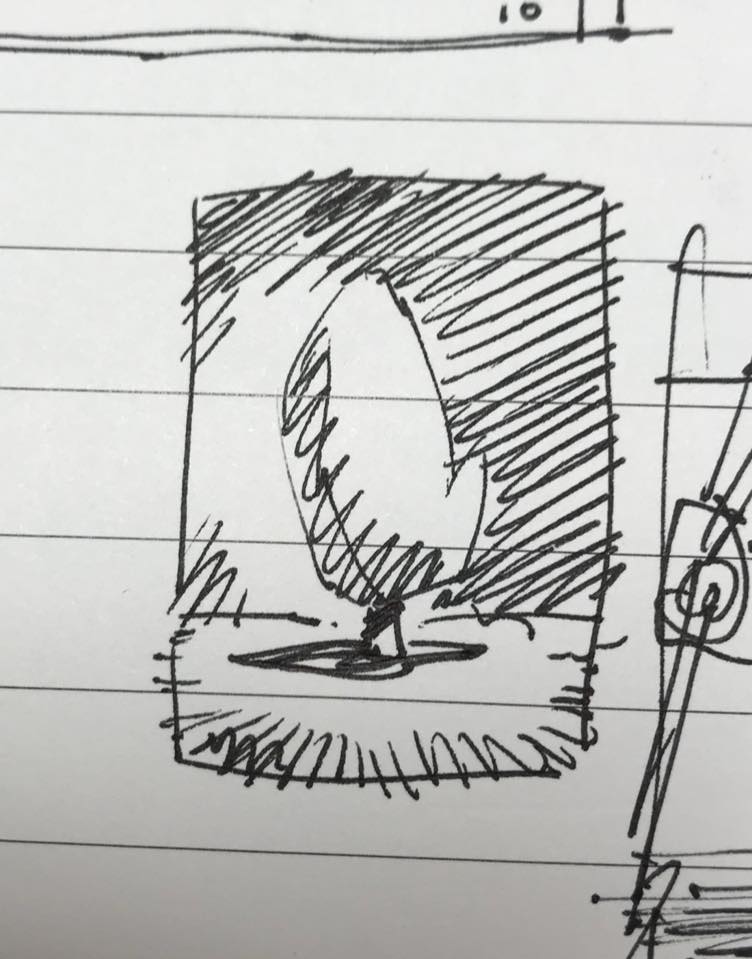
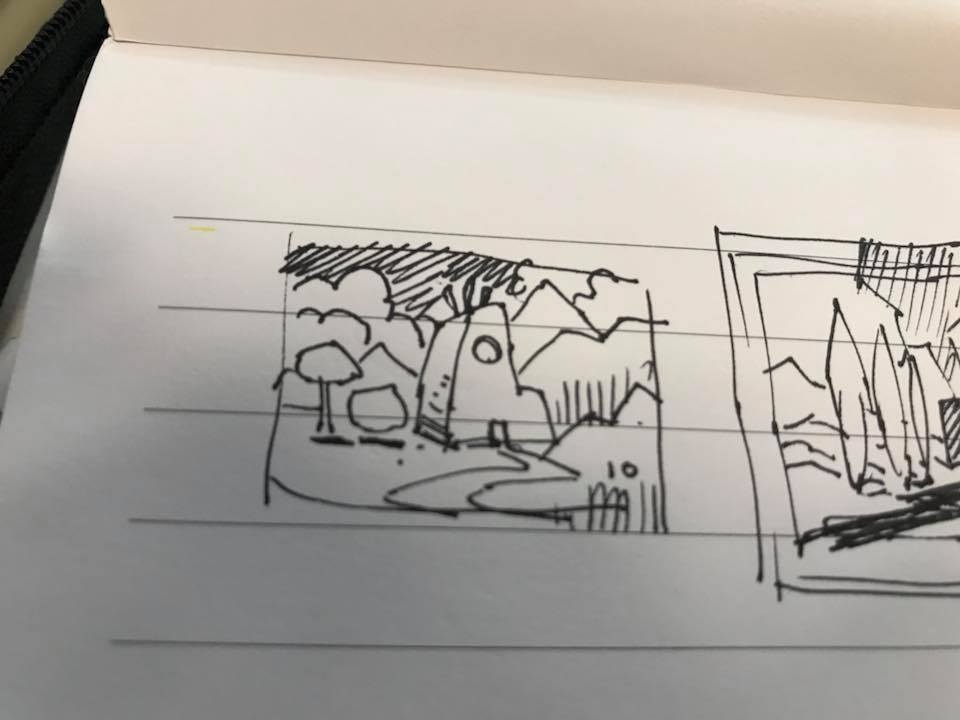
I started with doodling these little Neverhood-style landscapes.This is maybe one inch by two inches and I’m using a ballpoint pen in my sketchbook/journal. Always carry a little sketchbook or journal around to document whatever comes to your mind… because you will eventually forget those thoughts and you might want to write them down. But if you compare these loose sketches to the final, almost all of the content of the final oil paintings is complete at this early stage.
The first thing I do is go to Home Depot and buy masonite panel and some acrylic Gesso. Masonite is really cheap material and it’s fun to paint on. I have the Home Depot guys cut it for me (in California they often won’t cut masonite because the dust is a supposed environmental hazard). Here are two videos on applying gesso to panel:
https://www.facebook.com/dougtennapel/videos/1777272915644920/
One of my biggest blocks to painting is when it is inconvenient. For the last twenty years I’ve been oil painting in my living room and I’ve got so much as a drop of paint on the carpet (which pleases the Beloved Mrs. TenNapel). But I also wanted the materials to be inexpensive, compact, non-smelly and easy to clean up. This video will show you all of the basic tools I use and I got all of my brushes, turpentine, panel and paint for under $100. That’s a steal compared to most oil beginners. The last half of the video is how I prepare my grounds which is a fancy way of saying that I smear burnt umber on my gessoed masonite with a rag.
https://www.facebook.com/dougtennapel/videos/1779453985426813/
I can’t find the video where I’m actually doing the underpainting, but this one already has the underpainting finished. I go over all of the five colors I use for my pallet. I didn’t invent this, it’s called the Zorn Limited Pallet and it’s been around for over 100 years. Norman Rockwell and Leindecker learned on this pallet. The idea is that you can get most colors form black, white, sap green, cadmium red medium and yellow ocher. I’ve done hundreds of paintings using this pallet and it keeps me out of trouble because I’m not great with color theory so limiting the variables is a big help. After I introduce my pallet I paint a first layer on top of the burnt umber wash for my underpainting. So it’s like an underpainting on top of an underpainting.
https://www.facebook.com/dougtennapel/videos/1781293158576229/
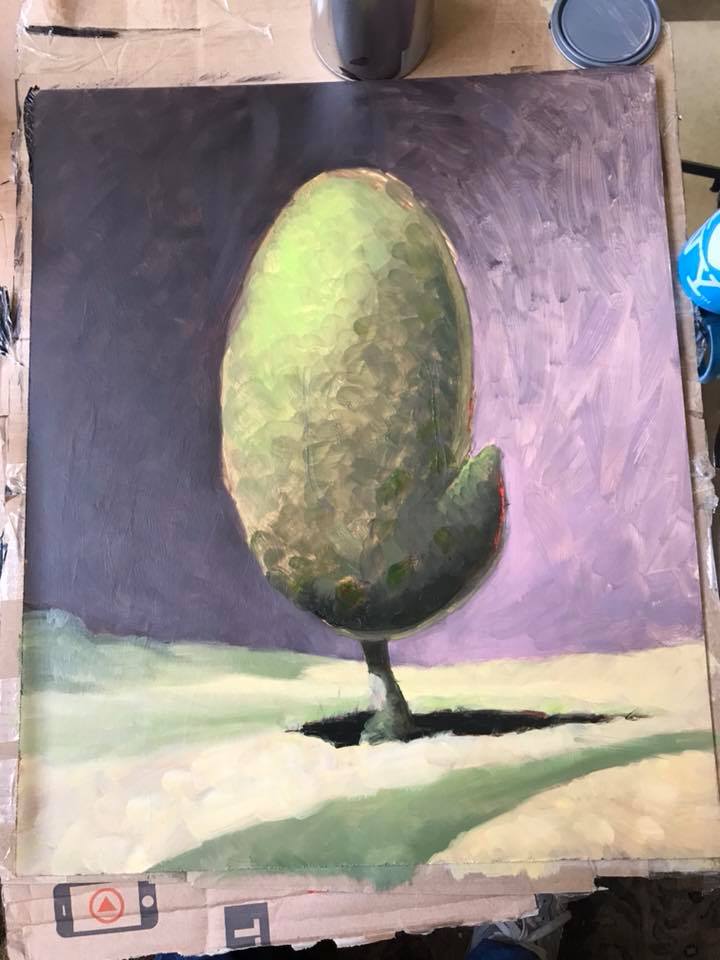
The first finished underpainting:
Here is the underpainting for the second part of the tryptic. I barely get a few strokes down before the video ends.
https://www.facebook.com/dougtennapel/videos/1781614565210755/
This is a long, thirty minute video where the third part of the tryptic is under-painted. The original burnt umber sketch is completely dry so I don’t have to worry about that color smearing into the top colors unless I really scrub it with paint, and painters shouldn’t scrub with their brush… a bad habit I’m trying to stop!
https://www.facebook.com/dougtennapel/videos/1781445728560972/
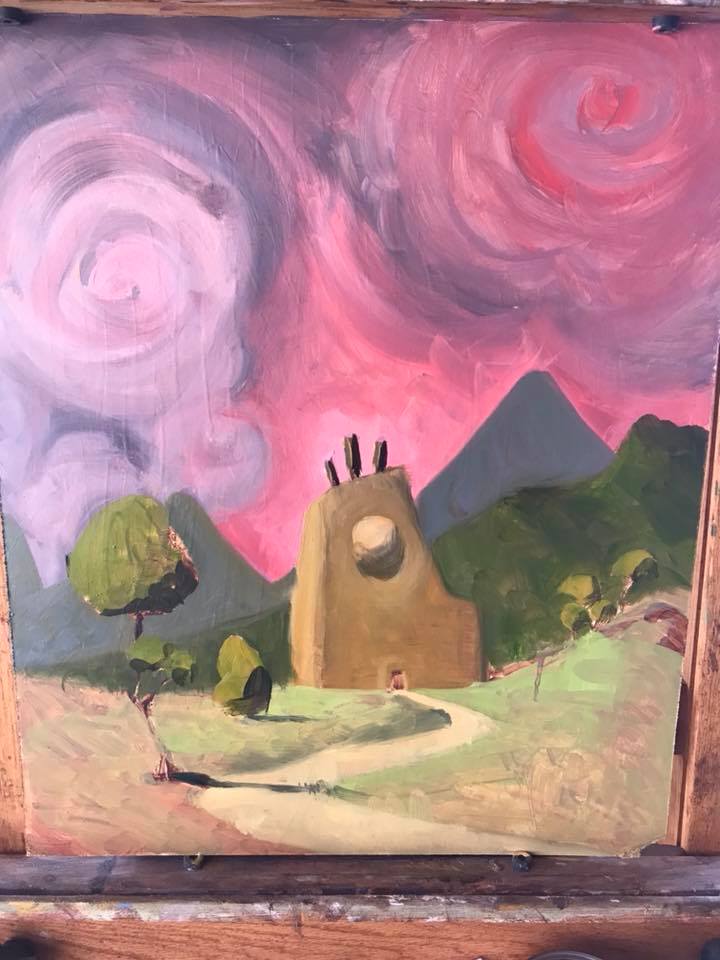
This is the third painting after finishing the underpainting. I make sure that everything I intend to say in the artwork is done at the underpainting, then if no matter if I build everything up or just touch it with a few strokes, I’ll feel like the content is safely encased in the painting. I can’t tell you how many times I’ve liked my under-paintings more than the finals!
After all three under-paintings are finished, I do one final layer on each, adding detail, popping highlights, and sometimes ruining a really good underpainting. But after it’s done, I frame them and hang them in the Beloved Mrs. TenNapel’s office. Click here for the big presentation of the final three images: